- Description
- Warranty Information
- Hardware Specifications
- How to Install Desktop RAM?
- How to Check Desktop RAM?
- FAQs
XUM Intel Core i9 RTX 4060 32GB RAM 1TB SSD + 2TB HDD RGB Gaming Desktop PC – Windows 11, WiFi, VR Ready to Game
Power, performance, and style – all in one machine. Whether you're gaming, streaming, editing, or multitasking, the XUM Intel Core i9 Gaming PC delivers next-level performance with premium specs and unbeatable value.
Hardware Specifications:
Category | Detail |
---|---|
Processor (CPU) | Intel® Core™ i9-11900F – 8 Cores / 16 Threads, up to 5.2GHz Turbo |
Processor Brand | Intel |
Graphics (GPU) | NVIDIA® GeForce RTX™ 4060 8GB GDDR6 |
Graphics Card Description | Dedicated |
Graphics Chipset Brand | NVIDIA |
Graphics RAM Type | GDDR6 |
Cooler | Peerless Assassin 120 SE |
Motherboard | ASRock H510-HDV/M.2 |
Memory | 32GB DDR4 3200MHz |
Storage SSD | 512GB NVMe SSD |
Storage HDD | 2TB HDD |
Power Supply | XUM 700W 80+ Bronze |
Case Fans | 6 x RGB Fans |
Ethernet | Gigabit LAN |
WiFi | 300 Mbps |
USB | 4x USB 3.2, 1x USB 3.0, 3x USB 2.0 |
Video Inputs | HDMI, DisplayPort |
Operating System | Windows 11 |
Includes | ARGB Lighting; Remote Included |
Size | 48H x 22W x 42L cm |
Warranty | 2 Year Parts & Labour, 60 Day Refund Period, Lifetime Technical Support |
Screen Resolution | 1920 x 1080 (Full HD), 2560 x 1440 (QHD) |
Game Performance Breakdown
Game | 1080p (High/Ultra FPS) | 1440p (High/Ultra FPS) | 4K (High/Ultra FPS) |
---|---|---|---|
Counter-Strike 2 | 250+ FPS | 180+ FPS | 90 FPS |
Valorant | 350+ FPS | 250+ FPS | 120 FPS |
Rainbow Six Siege | 230+ FPS | 180+ FPS | 100 FPS |
Cyberpunk 2077 | 70+ FPS (Ultra) | 60 FPS (Ultra) | 30-35 FPS |
Assassin's Creed Valhalla | 90+ FPS | 70+ FPS | 40 FPS |
Spider-Man: Miles Morales | 120+ FPS | 100+ FPS | 50 FPS |
Forza Horizon 5 | 150+ FPS | 110+ FPS | 60 FPS |
Red Dead Redemption 2 | 75+ FPS | 60 FPS | 30-40 FPS |
Elden Ring | 100+ FPS | 80+ FPS | 45 FPS |
Hogwarts Legacy | 100+ FPS | 80 FPS | 40 FPS |
Call of Duty: Warzone 2.0 | 150+ FPS | 120+ FPS | 60 FPS |
Battlefield 2042 | 120+ FPS | 90+ FPS | 50 FPS |
Apex Legends | 250+ FPS | 180+ FPS | 100 FPS |
Minecraft (RTX) | 200+ FPS | 150+ FPS | 75 FPS |
Fortnite | 200+ FPS | 150+ FPS | 70+ FPS |
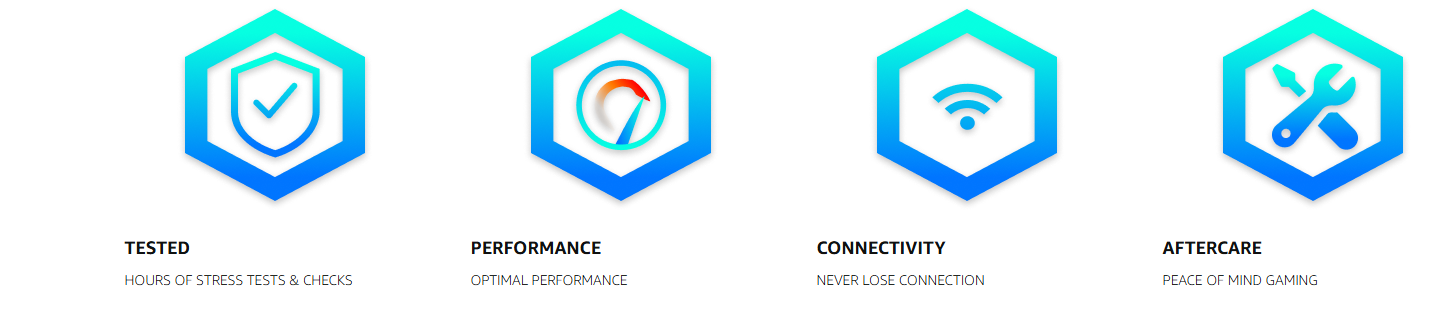
Why Choose XUM Gaming Desktop?
-
Unmatched Gaming Power: Equipped with the Intel Core i9 processor and RTX 4060 GPU, it offers high FPS performance for the latest games at 1080p, 1440p, and even 4K resolutions.
-
Seamless Streaming & Multitasking: With 32GB RAM and dual storage, stream, create, and game simultaneously without any slowdowns.
-
Aesthetic Appeal: With RGB lighting and 6 RGB fans, your setup will look as good as it performs.
Warranty & Support
-
2 Years Parts & Labour: We stand behind the quality of our desktops with a solid warranty.
-
60-Day Refund Period: If you’re not satisfied, we offer a 60-day money-back guarantee.
-
Lifetime Technical Support: Our team is always here to assist you with any questions or issues.
-
- Case:
- XUM
-
- Case Fans:
- 6 x RGB Fans
-
- Cooler:
- Peerless Assassin 120 SE
-
- CPU:
- Intel Core i9-11900F
-
- Ethernet:
- Gigabit LAN
-
- GPU:
- NVIDIA GeForce RTX 4060 8GB
-
- Includes:
- ARGB Lighting; Remote Included
-
- Memory:
- 32GB DDR4 3200MHz
-
- Motherboard:
- ASRock H510-HDV/M.2
-
- Power Supply:
- XUM 700W 80+ Bronze
-
- Size:
- 48H x 22W x 42L cm
-
- Storage HDD:
- 2TB
-
- Storage SSD:
- 512GB
-
- Type:
- Gaming Desktop
-
- USB:
- 4x USB 3.2, 1x USB 3.0, 3x USB 2.0
-
- Video Inputs:
- HDMI, DisplayPort
-
- WiFi:
- 300 Mbps
-
- Warranty:
- 2 Year Parts & Labour, 60 Day refund period, Life-Time Technical Support
-
- Core:
- 8
-
- Thread:
- 16
-
- CPU Boost Frequency:
- 5.2 GHz
Memory RAM Installation Guide for Desktop Computer
Step 1
Equipment required:
- Memory RAM modules
- Screwdriver (non-magnetic-tip)
- Owner’s manual

Step 2
-
Shut Down Your Computer:
Make sure to properly shut down your computer through the operating system.
-
Unplug the Power Cable:
Remove any cables connected to the computer, including the power cable.
-
Hold the Power Button:
Press and hold the power button for 5 seconds to discharge any residual electricity.
-
Open the Case:
Consult the owner’s manual for instructions on how to open your specific system’s case.

Step 3
-
Ground Yourself:
Touch an unpainted metal surface to discharge static electricity. Better yet, wear an anti-static wrist strap attached to a grounded object.
-
Locate the RAM Slots:
Open the case and locate the RAM slots on the motherboard.
-
- Remove Existing RAM (if applicable):
- Press down on the clips at the ends of the RAM slot.
- Gently remove the existing RAM module by holding the edges.

Step 4
-
Install New RAM:
- Hold the new RAM module by the edges.
- Align the notch on the module with the key in the slot.
- Firmly press the RAM into the slot until the clips snap into place. It may require about 30 pounds of pressure.
- Close the Case: Once all the RAM modules are securely installed, close the computer case.
- Reconnect Cables: Plug in the power cable and any other cables you disconnected.
-
Power On and Test:
Turn on your computer. It’s recommended to enter the BIOS to ensure the new RAM is recognized and running at the correct speed.

Post-Installation
- Check System Properties: Once your computer has booted into the operating system, check the system properties to confirm that the new RAM is detected and usable.
- Enjoy Your Upgraded Computer: You should now notice improved performance, especially when running memory-intensive applications.
Remember to handle the RAM modules carefully and avoid touching the gold connectors. Always work in a clean, static-free environment, and if you’re unsure about the process, seek professional assistance. Happy upgrading!
Happy upgrading!
How to Check Memory RAM in Your Desktop PC:
Make sure you are using a desktop computer because the RAM installation instructions are designed specifically for desktop computers.
Step 1: Identify Installed Memory
Press the Windows key + R to open the Run dialogue box.
Type "msinfo32" and press Enter. This opens the System Information window.
In the left pane, navigate to "System Summary". On the right side, you'll see details about your installed memory, including the total installed physical memory (RAM).

Using Command Prompt to Convert Memory Size to GB
Open Command Prompt by pressing the Windows key + R and typing "cmd" into the search bar.
Open Command Prompt by pressing the Windows key + R and typing "cmd" into the search bar. type the following command: "wmic memorychip get capacity" In the Command Prompt window, then Press Enter. This command will display the capacity of each memory module in kilobytes (KB).
- To convert KB to GB, divide the capacity by 1,048,576 (1024 * 1024).
- For example, if the capacity is displayed as 4294967296 KB, the calculation would be:
- 4294967296 KB / 1048576 = 4096 GB
- 4194304 KB / 1048576 = 4 GB
- Repeat this calculation for each memory module listed to determine the total memory size in GB.
Step 2: Maximum RAM Capacity
The maximum amount of RAM your computer can support is as follows:
- Press Windows Key + R, type cmd, and press Enter.
- In the command prompt, type wmic memphysical get maxcapacity, and press Enter.
- The result will be displayed in Kilobytes. Convert this to Gigabytes by dividing by (1024) twice. For example:
To calculate the maximum RAM capacity for a computer that supports up to 8GB:
- 10248388608KB=8192MB
- 10248192MB=8GB
- Thus, the maximum memory capacity is approximately 8 GB.
Step 3: RAM Slot Information Through Command Prompt.
- Press the Windows Key + R to open the Run dialog box.
- Type "cmd" and press Enter to launch Command Prompt.
- In the Command Prompt window, type: wmic Memphysical get MemoryDevices Then, press Enter.
- The number displayed represents the total number of RAM slots on your computer. For Example, if it shows '2', your computer has two slots.
To determine the maximum capacity per slot, divide the total maximum RAM by the number of slots. For example, if your system has a maximum capacity of 8 GB and 2 slots, each slot supports up to 4 GB.
Step 4: Slot Information Through Task Manager
Press Ctrl + Shift + Esc together to directly open the Task Manager.
Alternatively, press Ctrl + Alt + Delete, then select "Task Manager" from the options menu that appears.
Another alternative is to right-click on the taskbar and select "Task Manager" from the context menu.
Click on the "Performance" tab in the Task Manager window. In the left pane, click on "Memory". This will display information about your system's memory usage.
Look for the "Slots used" field under the "Memory" section. This indicates the number of memory slots currently in use.
Step 5: To identify the required generation of RAM:
- Open Task Manager with Ctrl + Shift + Esc or by right-clicking the Start button.
- Navigate to the ‘Performance’ tab to find the RAM generation (e.g. DDR3, DDR4). RAM generations are not interchangeable.
Step 6: Check Memory Speed
- In the same Memory section of the System Information window, look for the "Speed" field.
- The speed will be listed in megahertz (MHz) and indicates the frequency at which the memory operates.
Step 7: System Memory Support
Determine your system's architecture using either of the following methods:
Option 1: Using Command Prompt
- Press the Windows Key + R to open the Run dialog box.
- Type "cmd" in the command prompt window and then press Enter.
- In the Command Prompt window, type: wmic os get OSArchitecture Then, press Enter. This command will display whether your system is running a 32-bit or 64-bit version of Windows.
Option 2: Check System Memory Support.
- Press the Windows Key + R to open the Run dialog box.
- Type "msinfo30" in the Run dialog box to open the system information, then Press Enter.
- In the System Information window, look for the "System Type" under the "System Summary" section. This command will display whether your system is running a 32-bit or 64-bit version of Windows.
Based on your system's architecture, understand the following limitations:
- For 32-bit Windows: The maximum amount of RAM supported is typically around 4 GB, although this can vary depending on the specific version of Windows and any limitations imposed by hardware or software.
- For 64-bit Windows: The maximum amount of RAM supported varies depending on the specific edition of Windows. For example, Windows 10 Home supports a maximum of 128 GB of RAM, while Windows 10 Pro and Enterprise support up to 2 TB of RAM.
Gaming PCs FAQs
XUM gaming PCs are built with the latest technology and high-quality components to deliver exceptional performance and reliability for gamers.
All XUM gaming PCs come with a 2-year warranty that covers hardware defects and technical issues. Extended warranties are also available.
XUM gaming PCs are capable of running a wide range of games, from the latest AAA titles to classic indie games, at high settings. Please scroll down to find the list of compatible games on this page.
Your XUM gaming PC will come with a PDF setup guide. Additionally, Drmem provides online support to help you get started quickly and easily.
Yes, select models of XUM gaming PCs are VR-ready and fully equipped to handle virtual reality gaming.
Drmem provides comprehensive support for XUM users, including technical assistance, troubleshooting, and repair services.
The need to upgrade your XUM gaming PC depends on your gaming requirements and the evolving technology. Drmem’s team can advise you on the optimal upgrade path.
You can install any compatible software on your PC to enhance your gaming experience.
Yes, XUM PCs support multi-monitor setups, allowing you to expand your gaming and multitasking capabilities.
XUM gaming PCs are capable of running a wide range of games, from the latest AAA titles to classic indie games, at high settings. Please scroll down to find the list of compatible games on this page.
XUM PCs are designed with energy efficiency in mind, utilizing the latest power-saving technologies to reduce electricity consumption.
XUM PCs are available for purchase on Drmem’s official website, as well as through marketplaces like Amazon, eBay, Costco, etc.
Drmem accepts various payment methods, including credit/debit cards, PayPal, and Klarna financing options.
Drmem conducts rigorous testing and quality control checks on all XUM gaming PCs to ensure they meet the highest standards before shipping.